How to Clean Your Pet's Ears Safely and Effectively
The Step-by-Step Cleaning Process
Initial Assessment and Preparation
Before starting the cleaning process, take time to examine your pet's ears carefully. Look for any unusual redness, swelling, discharge, or odors that might suggest an infection. These warning signs mean you should stop and consult your vet right away - trying to clean infected ears could make things worse. Your veterinarian can properly diagnose any issues and recommend appropriate treatment.
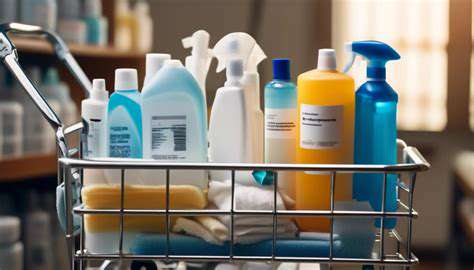
Prepare all your supplies in advance. You'll need a pet-safe ear cleaning solution (never use human products), soft cotton balls or clean cloths, and a towel for cleanup. Having everything ready makes the process smoother and less stressful for both you and your pet.
Understanding Your Pet's Ear Anatomy
Pets' ears are delicate structures that require gentle handling. Dogs and cats have different ear shapes, and knowing the basic anatomy helps prevent accidental injury. The ear canal has sensitive areas you'll want to avoid during cleaning, so focus only on the visible outer portions you can easily see.
Be especially careful around the deeper parts of the ear canal where fragile structures are located. Cleaning should never involve probing deep into the ear - this could cause serious damage.
Choosing the Right Cleaning Solution
Selecting an appropriate cleaner is crucial for your pet's safety. Only use solutions specifically made for pets, as human products can be too harsh. Pet-safe formulas are designed to be gentle on sensitive ear tissues while effectively removing wax and debris.
Always read and follow the product instructions carefully. Different brands may have specific directions about how much solution to use and the best application method for optimal results.
The Gentle Cleaning Technique
When your pet is calm, gently lift the ear flap without pulling. Apply the recommended amount of cleaner to the outer ear canal, being careful not to insert the bottle tip too deeply. Massage the base of the ear gently to help distribute the solution and loosen debris.
Use a soft cloth or cotton ball to wipe away loosened material from the outer ear. Avoid using cotton swabs or pushing anything into the ear canal, as this can pack debris deeper inside and potentially cause damage.
Post-Cleaning Care and Aftercare
After cleaning, thoroughly dry your pet's ears to prevent moisture buildup that could lead to infections. Watch for any signs of irritation in the following days, such as increased redness, swelling, or discharge.
Make ear checks part of your regular grooming routine. Regular monitoring helps catch potential problems early, when they're easiest to treat. If you notice anything unusual, contact your veterinarian promptly.
Important Considerations and Safety Precautions
Always check with your vet before starting any new ear care routine, especially if your pet has a history of ear problems. They can recommend products and techniques tailored to your pet's specific needs.
Never use cotton swabs or insert anything into the ear canal - this is one of the most common causes of ear injuries in pets. If you're uncertain about any part of the cleaning process, it's always better to ask your vet for guidance first.
Important Considerations for Different Pet Breeds and Health Conditions
Choosing the Right Supplies
Breed-specific needs vary widely when it comes to grooming tools and care products. A fluffy Pomeranian needs different brushes than a smooth-coated Boxer, and senior pets often benefit from orthopedic bedding. Research your pet's breed characteristics to select appropriate supplies that will keep them comfortable and healthy.
Consider your pet's activity level and lifestyle too. Active dogs might need more durable toys, while indoor cats may prefer puzzle feeders to keep them mentally stimulated.
Dietary Needs and Allergies
Pets have unique nutritional requirements based on their age, size, and health status. Some breeds are prone to food allergies that can cause skin or digestive issues. Watch for signs like itching, ear infections, or stomach upset that might indicate food sensitivities.
Large breed puppies need specially formulated food to support proper bone development, while small breeds often do better with smaller kibble sizes. Your vet can recommend the best diet for your pet's specific needs.
Grooming and Hygiene
Grooming requirements differ dramatically between breeds. Long-haired animals need frequent brushing to prevent mats, while short-haired pets may need less coat care but more frequent bathing. Proper grooming prevents skin problems and helps you spot health issues early.
Don't forget about dental care - regular tooth brushing and dental chews can prevent painful dental disease in all breeds.
Exercise and Activity Levels
Energy levels vary greatly by breed. High-drive working dogs need vigorous daily exercise, while brachycephalic (short-nosed) breeds require gentler activities. Matching exercise to your pet's needs prevents obesity and behavior problems while keeping them happy and healthy.
Mental stimulation is just as important as physical exercise. Training sessions, food puzzles, and new experiences help keep pets engaged and well-behaved.
Veterinary Care and Health Conditions
Certain breeds are predisposed to specific health issues. Large dogs often develop joint problems, while some small breeds are prone to dental issues. Regular veterinary checkups help detect breed-specific conditions early, when they're most treatable.
Preventive care like vaccinations, parasite control, and weight management can help all pets live longer, healthier lives regardless of breed.
Post-Cleaning Care and Prevention
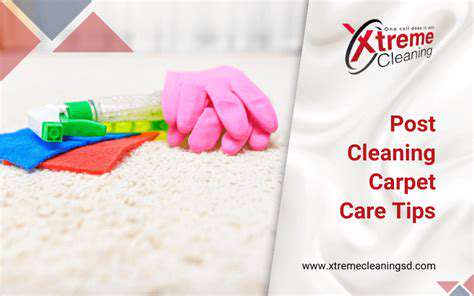
Post-Cleaning Drying
Thorough drying prevents mold and mildew regrowth. Pay special attention to crevices and corners where moisture collects. Using absorbent microfiber cloths helps remove water completely from surfaces.
Limit water use during cleaning to make drying easier. Targeted cleaning reduces moisture buildup and prevents future problems.
Maintaining a Healthy Environment
Good airflow is essential for preventing moisture-related issues. Opening windows regularly and using exhaust fans helps control humidity levels that can lead to mold growth.
Check frequently for damp spots, especially in bathrooms and basements. Addressing moisture problems quickly prevents more serious issues later.
Preventing Future Soiling
Simple preventive measures reduce cleaning frequency. Entryway mats trap dirt before it spreads through your home, while regular vacuuming maintains cleanliness between deeper cleanings.
Protective covers on furniture and high-use areas prevent stains and wear, saving time on cleaning and replacement costs.
Using the Right Cleaning Products
Match cleaning products to surface materials to avoid damage. Always follow manufacturer instructions for safe, effective use.
Natural cleaners like vinegar and baking soda work well for many tasks while being gentler on surfaces and the environment than harsh chemicals.
Regular Maintenance Schedules
Consistent cleaning routines keep homes fresher with less effort. A weekly checklist ensures all areas get regular attention, preventing buildup of dirt and grime.
Focus on high-traffic zones more frequently, with whole-house deep cleaning scheduled seasonally or as needed.
Surface-Specific Care
Different materials require different care approaches. Understanding proper maintenance for wood, tile, and other surfaces preserves their appearance and longevity.
When in doubt, consult manufacturer guidelines or professionals for specialized materials like stone or delicate fabrics.
Professional Cleaning Services
For tough jobs or specialty cleaning, professionals bring expertise and equipment homeowners typically lack. Periodic professional cleanings maintain your home's condition and appearance between regular maintenance.
Deep cleaning services can tackle built-up grime in carpets, upholstery, and hard-to-reach areas more effectively than standard home cleaning.